Around September last year, Paul came up with a router plane designed to be made by woodworkers of any skill level using only basic tools and materials. This router was Paul’s solution to a very real problem, which is the high prices of commercially available routers, be that new or used (the router being one of the tools he considers essential for woodworking). I therefore thought it would be worth sharing my own conclusions a year since Paul first came up with his first prototypes, as well as discussing the significance of this contribution to the craft in general.
Jump to Main Contribution
Overview:
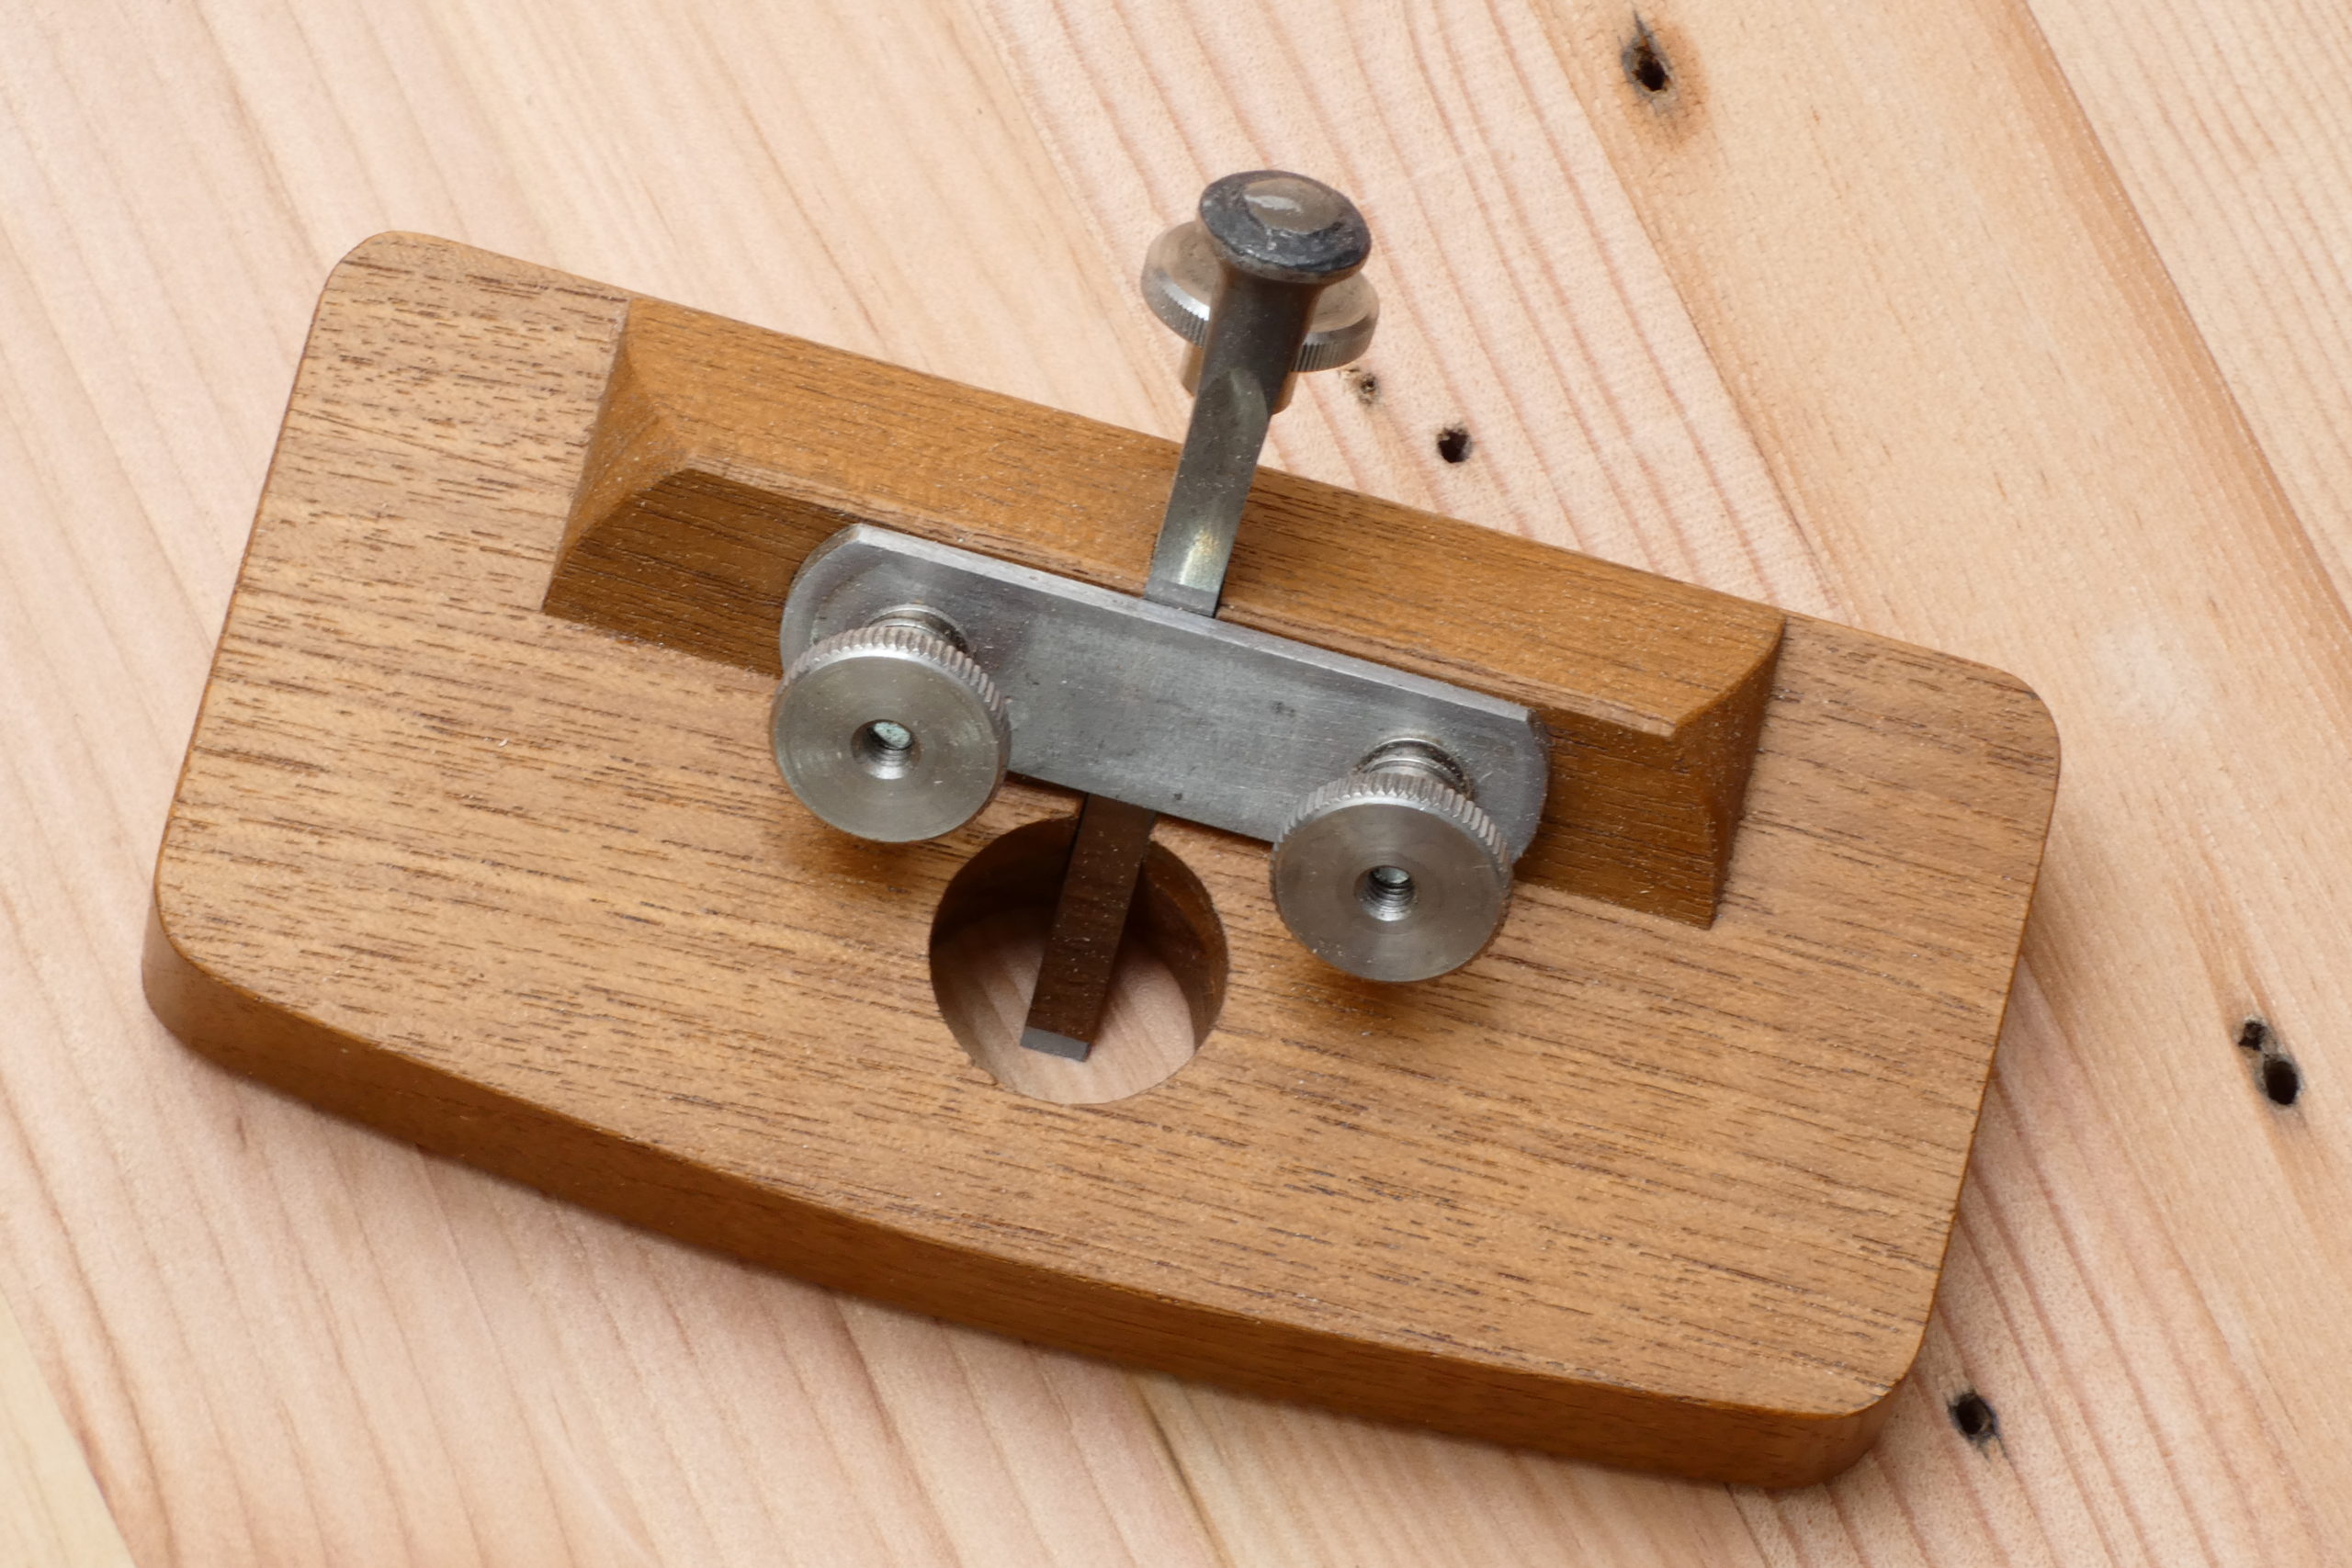
The PS router plane consists of a wooden body that houses a straight blade in a channel at a fixed bedding angle. The bevel-down blade is secured by a retainer bar which is tightened with a pair of thumb nuts anchored to the wooden body via two wood-to-metal hanger bolts either side of the channel. The router also features a depth adjuster in-line with the blade, which operates by turning a thumb nut clockwise or anticlockwise on another hanger bolt. The two knobs on the extremes are not essential because the thickness of the router body allows for a very comfortable low grip, which is ideal for applying direct, controlled force when routing a recess.
In terms of construction, once the metal components are sourced, it takes surprisingly little time to put the router together. Making the wooden body is fairly straightforward, especially with Paul’s updated method for laying out the channel in the upstand.
Performance:
Needless to say that the primary element to review on any hand-tool should be how it performs in that which it was designed for. Anyway, for a whole year, Paul has only been using the routers that he’s made, as you will have seen if you follow WWMC. He also shows a couple of demos at the start of his Youtube video where he shows how to make the plane. Below are just a couple of clips of my own, including one in slow motion showing a real-life use of the tool. The recess I am routing is 4″ wide by 5/8″ deep and 7″ long and I am working with softwoods with plenty of knots and quite varied grain direction.
A design concept, not a product for mass manufacturing
To the disappointment of some, perhaps, I must say now that I’m not really interested in reviewing the exact router as depicted in the technical drawings because that is a very recent practice, or trend which has nothing to do with the craft, but obeys a (pathetic) modern view in which tools are made for the satisfaction, comfort and admiration of the individual… By definition, tools are made for work and this has been the case for millennia. Craftsmen were used to having to tweak and personalise new tools, so it is fitting to reiterate here that anyone making this plane should expect to understand what they’re doing and make certain decisions for themselves, even though Paul has tried to make it as fool-proof as possible (and I’m sure we’re all grateful for that).
All this to say Paul never intended everyone to replicate his router with exactitude. In fact, no two out of the dozen plus routers that he’s made are identical. Rather, the greatest contribution to the craft and to hand-tool woodworkers (both current and future) is in the design concept; the simplicity of the build, to start, is quite remarkable. The straight cutter alone is a clear winner over the bent cutters which require more advanced metalworking skills to make and are harder to sharpen.
By incorporating modern(ish) materials (such as wood-to-metal hanger bolts), the PS router can be seen as an evolution or rebirth of the early wooden router, which now requires no wedge and no precise hole (nor tapered blade), and the depth of cut can be adjusted incrementally without having to tap with a steel hammer.
Main Contribution
The most revolutionary aspect of the PS router, however, is that this is the first router design with a depth adjustment mechanism where the depth of cut can be altered continuously without having to release pressure from the cutter every time. In incorporating the retainer bar and spring washers the way he did, Paul applied to a router plane, for the first time, the principle introduced with Leonard Bailey’s lever cap on a bench plane over 160 years ago, which allows enough pressure to keep the cutting iron pushed tight against the bed yet still free enough to slide up and down for fine adjusting the depth of cut. (Of course, I am not saying that the PS router will be as revolutionary as L. Bailey’s contribution because the router plane will never be as essential as the bench plane. But for the user –or rather, to the craftsman and craftswoman– this contribution is simply priceless.)
It should be stated here that to achieve this smooth operation I have just described, you will most likely need to spend a bit of time working on the meeting surfaces between the cutter and the channel (especially the extension on the sole) to minimise friction as much as possible, i.e. with graphite or furniture wax, so that the cutter can slide up and down easily, even when it is cinched down quite tight. You may also want to file the hard corners on the retainer bar and on the top edges of the cutter where these rub against each other, although this is less critical if you ensure the retainer bar is applying equal pressure along the cutter. And as with all metal to metal meeting surfaces, applying a drop of oil here will also make a difference.
Playing with the variables.
As I mentioned at the start, Paul’s focus was on providing a solution to a real problem, and the solution he came up with was revolutionary. What he mostly worked on was the design concept, including construction methods. He altered a couple of variables but left a lot of room for others to continue. And remember, the PS router is not meant to be produced industrially, but individually by woodworkers of all skill levels.

The main variables are the relative position of the hole/cutter and the bedding angle of the blade; of the two, I have found that only the former makes a noticeable difference; a 50° bedding angle works great and gives you a wider upstand than 45° with no perceptible difference. I recommend that you make the upstand, present it on the base and then slide it back as far as possible so that the channel extends through the sole of the plane almost to the bottom. In doing this, you can increase (even triple) the length of the channel, creating a more solid bed for the cutter. This makes a big difference as it significantly reduces torque on the blade, especially when routing deep recesses. It also improves visibility of your work because the edge of the cutter comes out quite far back from the front of the hole.


To me, this recent contribution of Paul’s is just another indicator that the Craft is alive. We have an actual working craftsman who understands his Craft and is innovating to solve real problems for woodworkers (rather than devising new products for the market), in a way that no ‘high-end’ tool manufacturer could nor has any engineers done for several decades (aside from playing with new alloys and applying modern engineering to old designs. The feedback Paul has received over the last year shows people’s appreciation and gratitude for the legacy he is passing on as he pushes on to make the Craft a viable option to an ever increasing population.
MY VEREDICT FOR THE PS ROUTER (which I must reiterate, is not just the router but it includes you making it): Priceless, as you will soon discover when you make your own, even if, like me, you already have a metal router. Trust me, you will not regret it.
For a comprehensive Step-by-Step guide on making the PS router on Paul’s website, click here.

Leave a comment